

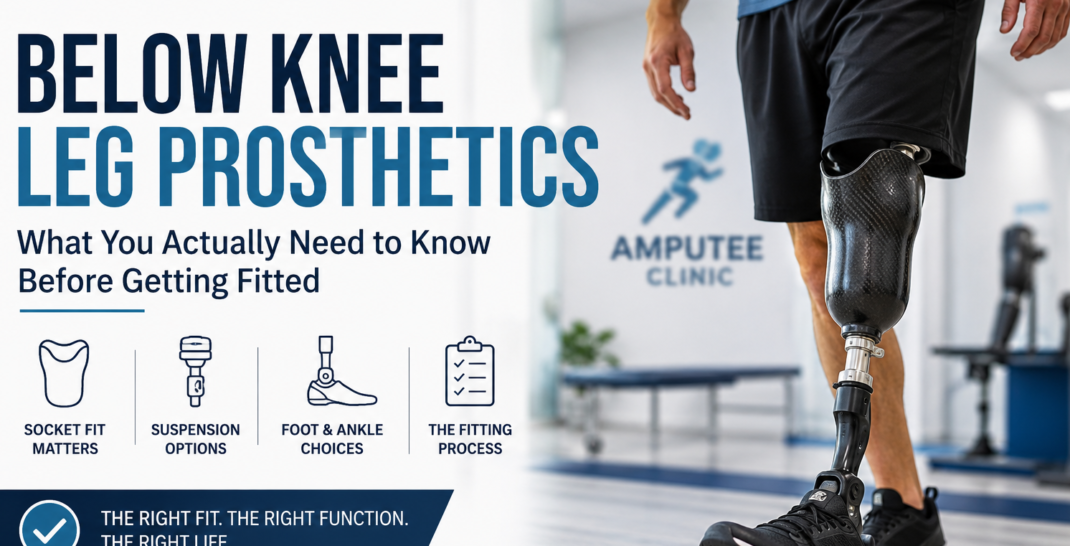
Most people walking into their first prosthetic consultation after a transtibial amputation ask the same question:
“What’s the best leg out there?”
It’s the wrong question, and I don’t say that to be dismissive. I say it because the answer is deeply individual, and the factors that matter most aren’t always the ones you’d expect.
I’ve worked with patients who got the most expensive carbon fiber feet on the market and were miserable at six months, and others who did beautifully with a more modest setup that matched their lifestyle perfectly.
So let’s walk through what actually matters when you’re looking at below knee prosthetic options, from the socket down to the foot, and what questions are worth asking before you commit to anything.
The Socket Is Where Everything Starts
Ask most people what they picture when they think of below knee leg prosthetics, and they’ll describe the foot or the pylon.
The socket rarely comes up. That’s backwards. The socket is the single most important component in any transtibial system, because it’s the interface between your residual limb and everything below it. Get it wrong, and no amount of high-tech componentry saves you.
What Happens With a Poorly Fitted Socket?
A poorly fit socket creates:
- Pressure points that lead to skin breakdown and sores
- Pistoning — the limb moving up and down inside the socket during gait, which destroys suspension and wrecks your walking pattern
- Poor load distribution that causes compensatory strain on your intact limb, hips, and back
A well-fit socket, by contrast, can make a modest foot feel surprisingly good.
How Are Prosthetic Sockets Made?
Sockets are fabricated in a few main ways:
- Traditional plaster casting: still used and works well in skilled hands.
- Digital scanning and CAD/CAM milling; improves consistency and speeds up the process; increasingly common across clinics.
- In-house fabrication: at Amputee Clinic we do in-house fabrication, which means we’re not outsourcing your socket to an off-site lab. If something needs adjustment, it happens fast.
Socket Suspension Options
Suspension is how the socket stays on your limb. Here’s a quick comparison of the main systems:
| Suspension Type | How It Works | Best For | Tradeoff |
|---|---|---|---|
| Pin Locking | A pin at the bottom of the liner clicks into a lock inside the socket | Many active users; straightforward daily use | Slight mechanical pull at end of each step |
| Vacuum-Assisted (VAS) | A pump evacuates air between the liner and socket wall | Users needing tighter fit and better proprioception | Higher cost; requires maintenance |
| Elevated Vacuum | Continuously maintains negative pressure, more active than standard VAS | High-activity users needing maximum ground feel | Most expensive; not always covered by insurance |
| Lanyard | A fabric strap pulls up through a hole in the socket bottom | Some lower-activity users; older designs | Less dynamic; less precise suspension |
Your prosthetist will recommend a suspension system based on your activity level, limb volume stability, and skin condition.
Don’t assume the most technical option is always the right one.
Foot and Ankle Components: More Options Than You’d Think
The prosthetic foot is where engineering and function meet most visibly. There’s a wide range of components available, and they’re not interchangeable based on price alone. Activity level, body weight, terrain, and what you actually want to do day-to-day all factor in.
| Foot Type | Energy Return | Terrain Handling | Typical User |
|---|---|---|---|
| SACH (Solid Ankle Cushion Heel) | None | Flat surfaces only | Very low-activity ambulators; early rehab |
| Dynamic Response / Energy-Return | High (carbon fiber keel) | Paved and moderate outdoor terrain | Active community ambulators |
| Multi-Axial | Moderate | Uneven ground, moderate outdoor terrain | Moderately active users facing varied surfaces |
| Microprocessor Ankle | Variable (adjusts in real time) | Slopes, stairs, unpredictable terrain | High-activity users on varied terrain |
A Few Notes Worth Adding
- Dynamic response feet from brands like Össur, Otto Bock, and Fillauer are the most commonly prescribed for active users and represent a well-developed category with lots of fit options.
- Microprocessor ankles — devices like the Össur Proprio Foot or the Ottobock Taleo — exist for transtibial amputees, not just above-knee. They’re expensive and not covered by all insurers, but for people navigating slopes, uneven ground, or unpredictable terrain regularly, they can meaningfully improve gait quality.
- Partial foot amputees face a different set of biomechanical challenges, particularly around preserving toe-off mechanics when part of the forefoot is absent. Partial foot prosthetics address these differently than standard transtibial fitting.
What the Fitting Process Actually Looks Like
A lot of patients arrive expecting this to be straightforward:
Measure → Build → Walk Away
It rarely works like that, and that’s fine. Below-knee leg prosthetics that fit well are the result of an iterative process, not a single appointment. Here’s a rough sequence of what to expect:
Step 1: Initial Evaluation
Your prosthetist assesses your residual limb, skin condition, muscle tone, and overall health.
They’re also asking about your goals. Someone who wants to return to hiking has different needs than someone focused on getting back to work at a desk job.
Step 2: Casting or Scanning
Your residual limb is either cast in plaster or scanned digitally to create the socket mold.
Step 3: Check Socket Fitting
A clear test socket is often fabricated first.
This lets your prosthetist see exactly where pressure is concentrating and adjust before committing to the definitive socket.
Step 4: Componentry Selection and Build
Once the socket fit is approved, the system is assembled with your chosen foot and suspension.
Step 5: Gait Training
Getting a prosthesis fitted is step one.
Learning to walk well with it is an entirely separate process that involves working with a physical therapist.
Step 6: Follow-Up Adjustments
Residual limbs change volume, especially in the first year post-amputation.
Expect follow-up visits.
Timelines vary based on your healing status, insurance, and clinic volume. If you want a more detailed breakdown, we’ve written about what to expect when getting fitted in a separate post that covers the process step by step.
Factors That Complicate the Fit
Some patients have a more straightforward path to a functional prosthesis. Others face real challenges, and being upfront about them makes the outcome better.
| Complicating Factor | Why It Matters | How It’s Managed |
|---|---|---|
| Short residual limb | Less surface area for socket fit; reduced lever arm for gait control | Creative socket designs; adjusted component selection |
| Skin grafts or scarring | Changes how the socket can be shaped and loaded | More custom socket work; careful pressure mapping |
| Higher body weight | Components are rated by weight category; wrong rating creates safety and performance problems | Weight-appropriate component selection from the start |
| Limb volume fluctuation | Day-to-day swelling (common in diabetes or circulation issues) makes consistent fit difficult | Vacuum suspension; multiple liner thicknesses |
| Activity goal vs. K-level mismatch | Insurance coverage is tied to K-levels (K0–K4), which don’t always reflect what a patient actually wants to do | Navigating coverage gaps with documentation and clinical justification |
A Few Factors Deserve Extra Attention
Body weight affects component selection significantly and comes up more than people expect. We’ve addressed it in detail in our post on prosthetics for heavier patients.
K-levels are worth understanding before you walk into an insurance conversation. K0 means non-ambulatory; K4 means high-activity (think sports or physical labor). Most community walkers fall somewhere in K2–K3, and that classification directly affects what components your insurer will approve.
If you’re in the early stages of deciding where to go for care, our blog on choosing the right prosthetic clinic covers what questions to ask and what to watch out for.
Life With a Transtibial Prosthesis
Below knee amputees, statistically, achieve some of the highest rates of successful prosthetic use compared to other amputation levels.
The preserved knee joint is a major functional asset. That said, “successful use” encompasses a wide range of outcomes, and your experience will depend heavily on the quality of your fitting, your commitment to rehabilitation, and your support system.
A Few Things That Don’t Get Talked About Enough
- Skin care is a daily job. Residual limb hygiene, liner cleaning, and monitoring for skin breakdown aren’t optional. Ignoring them leads to breaks in prosthetic use, and breaks in use lead to deconditioning — which sets everything back.
- Your first prosthesis won’t be your last. Most active users are looking at a new socket every one to three years as their limb matures and their goals evolve.
- Component upgrades happen. As your activity level increases or new technology becomes relevant, you may swap out feet or suspension systems. That’s normal, not a sign that something went wrong early on.
- Rehab is non-negotiable. The prosthesis is a tool. Learning to use it well, gait mechanics, energy efficiency, and navigating different surfaces takes time and work with a physical therapist.
You can view the full range of custom prosthetic leg options we offer, or if you’re ready to talk through your specific situation, reach out to our clinic to schedule a consultation.
The first conversation is free, and it’s usually where the right questions start getting asked.